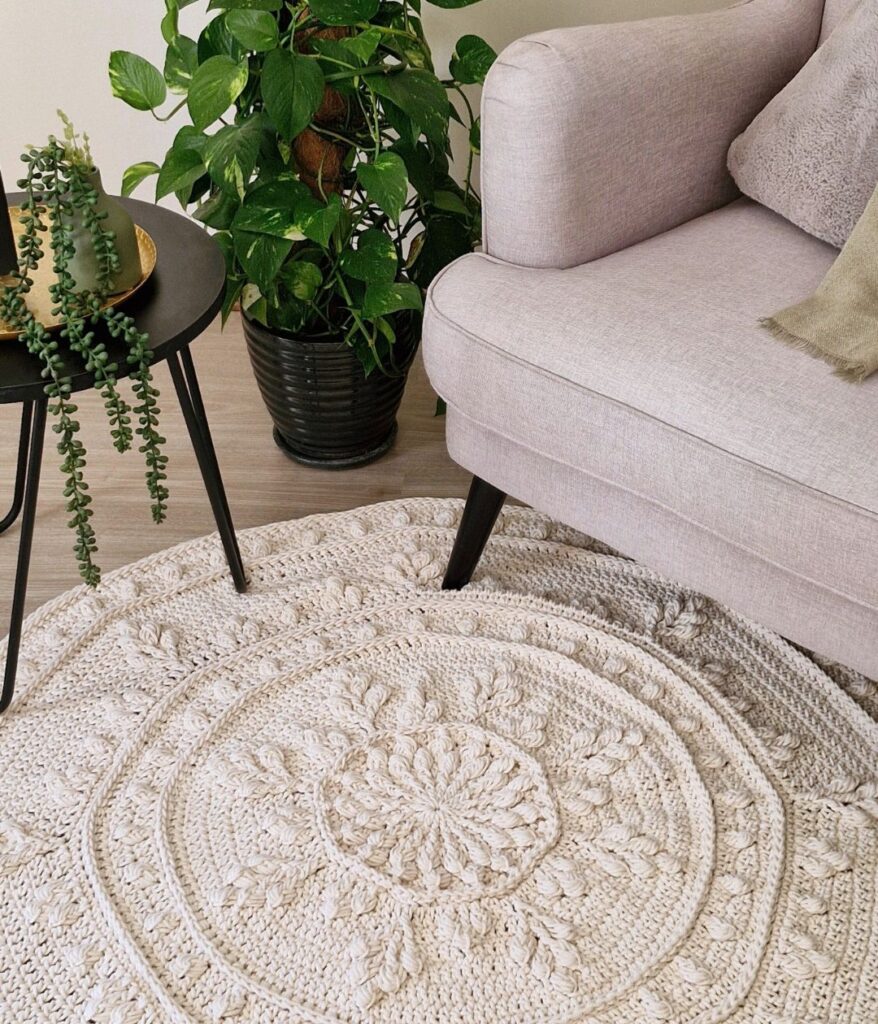
Introducing the versatile Oasis crochet floor rug, designed to meet both your aesthetic and functional needs of any modern home. This round rug, features a beautiful textured pattern and adds a touch of elegance to any room.
Its unique design includes an extension option, allowing you to create a larger rug to perfectly fit your space.
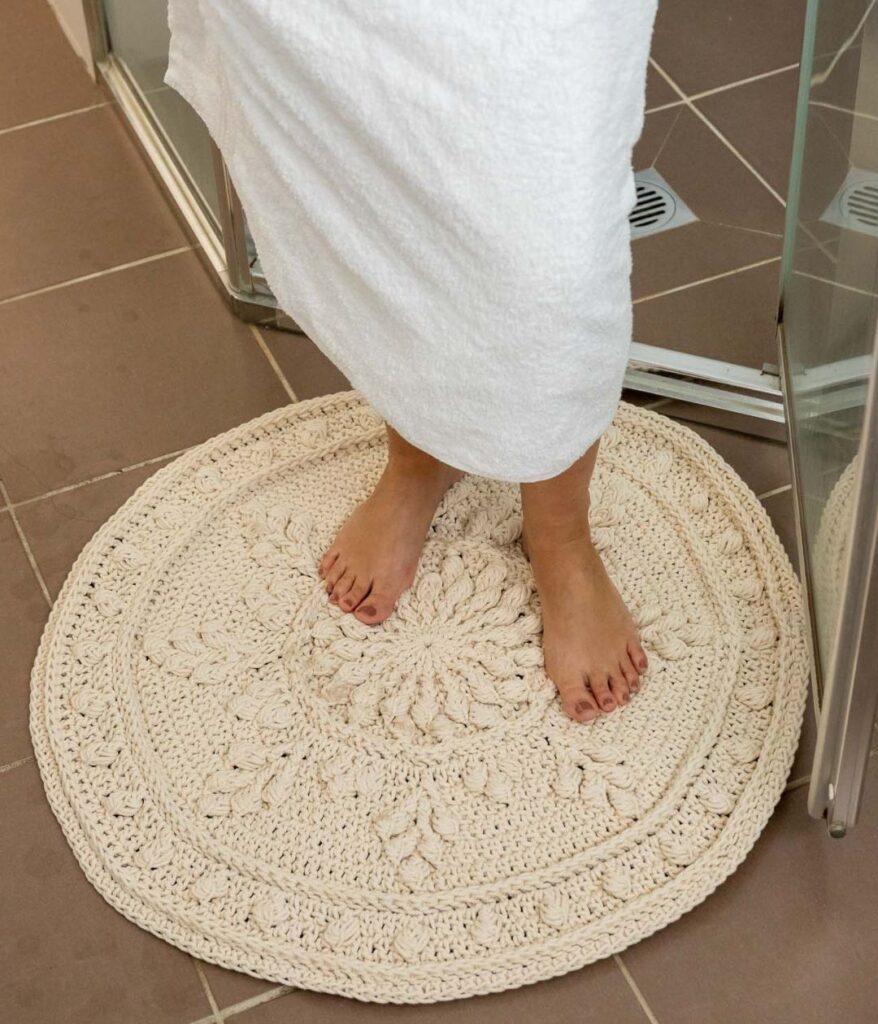
Crochet the smaller Oasis rug for use as a bath mat, providing a comfortable and stylish addition to your bathroom decor.
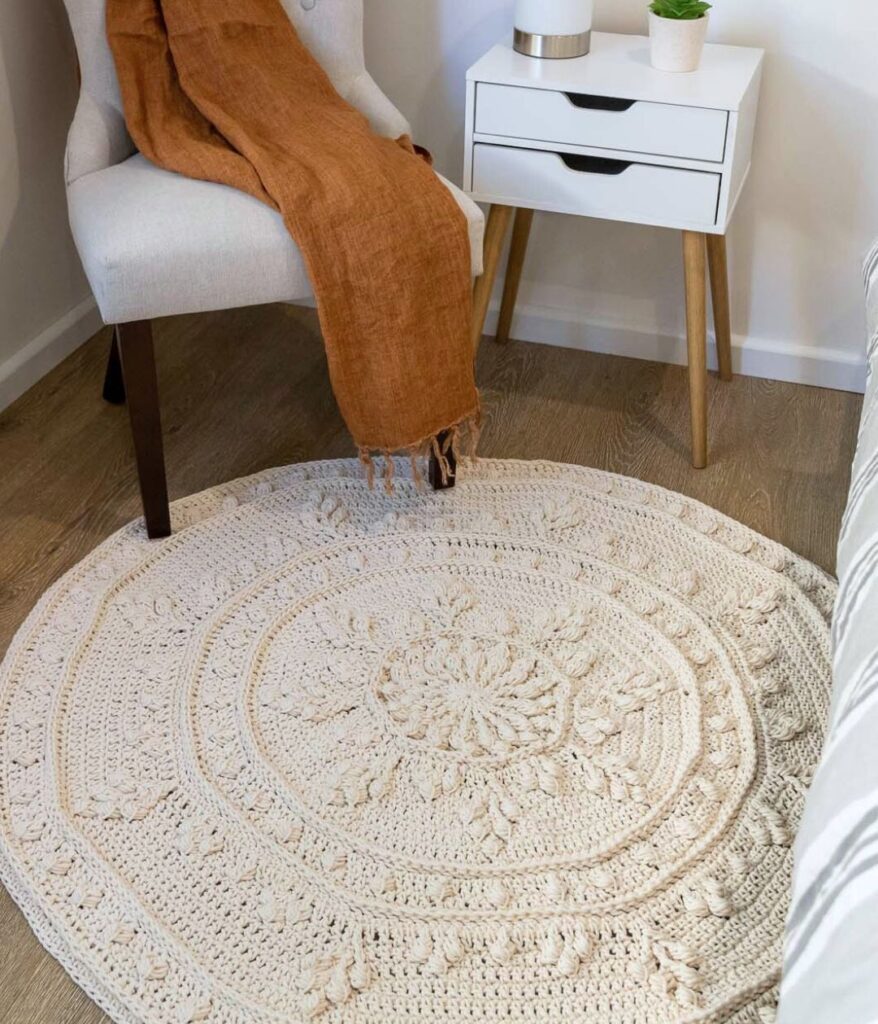
Or crochet the larger Oasis + Extension for use in any other room in your home.
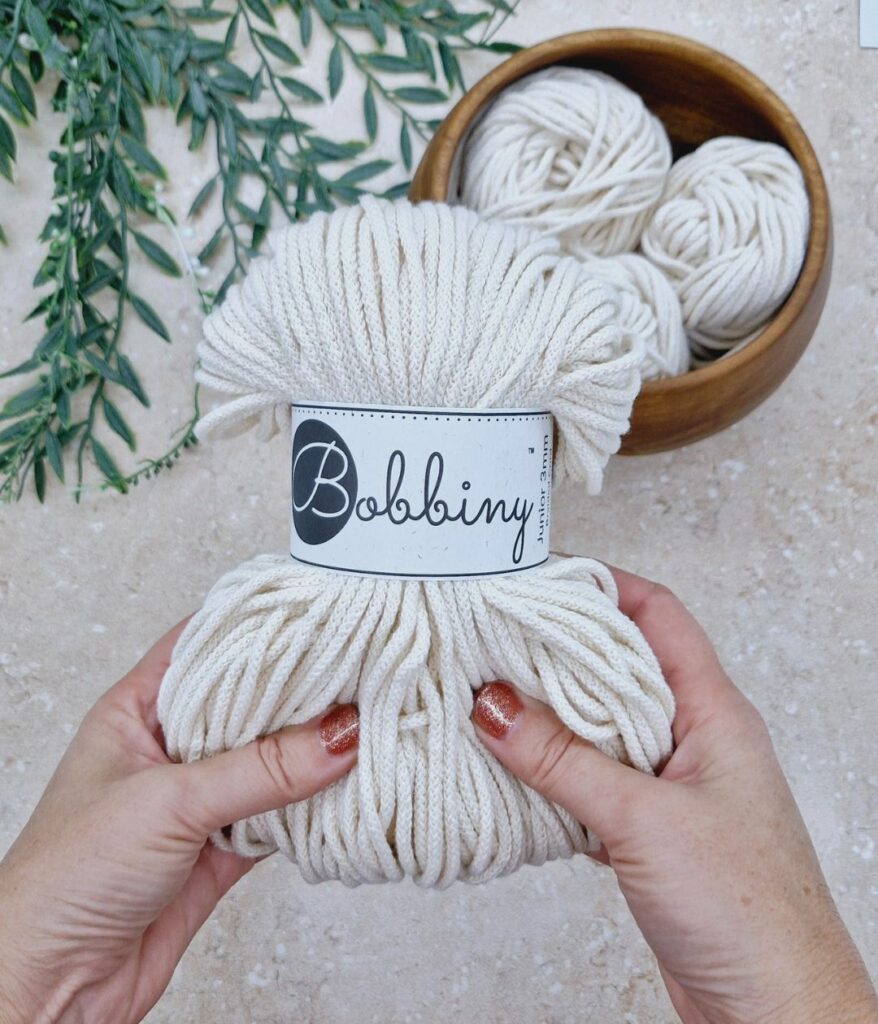
Bobbiny Junior 3 mm Cotton Cord
Braided cotton cord
Category 5/Bulky/Craft/Rug/12 ply
1200 m (1313 yd)
OR
1, 2, or 3 strands of other yarn held together. Click here for Yarn Substitutions.
This rug can be crocheted using the cord listed above or another braided cotton cord such as Chunky Yarn Barn’s Matilda 3 mm cotton cord.
The main reasons I use braided cotton cord are:
Great Stitch Definition: Cotton yarn or cord is smooth without any ‘fuzz’ or pilling once used.
Absorbent: Making it ideal for bath mats.
Washable: Cotton rugs can be easily machine or hand washed.
However, I understand that this cord may not be suitable for everyone. So I have designed it to be crocheted using just about any yarn and any fibre. Whenever substituting the yarn, aim for the number of strands that will result in a thickness equivalent to a Bulky/Chunky/Craft/Rug/12 ply. This will create a rug that is a practical size.
For example:
1 strand of Bulky/Chunky/Craft/Rug/12 ply, or
2 strands of Worsted/Afghan/Aran/10 ply, or
3 strands of DK/Light Worsted/8 ply.
Alter hook size as needed.
For a list of 20+ substitutes, including 1, 2 and 3 strands, please click here.
You can read more about choosing the Best Yarn for Your Crochet Rug in this blog post.
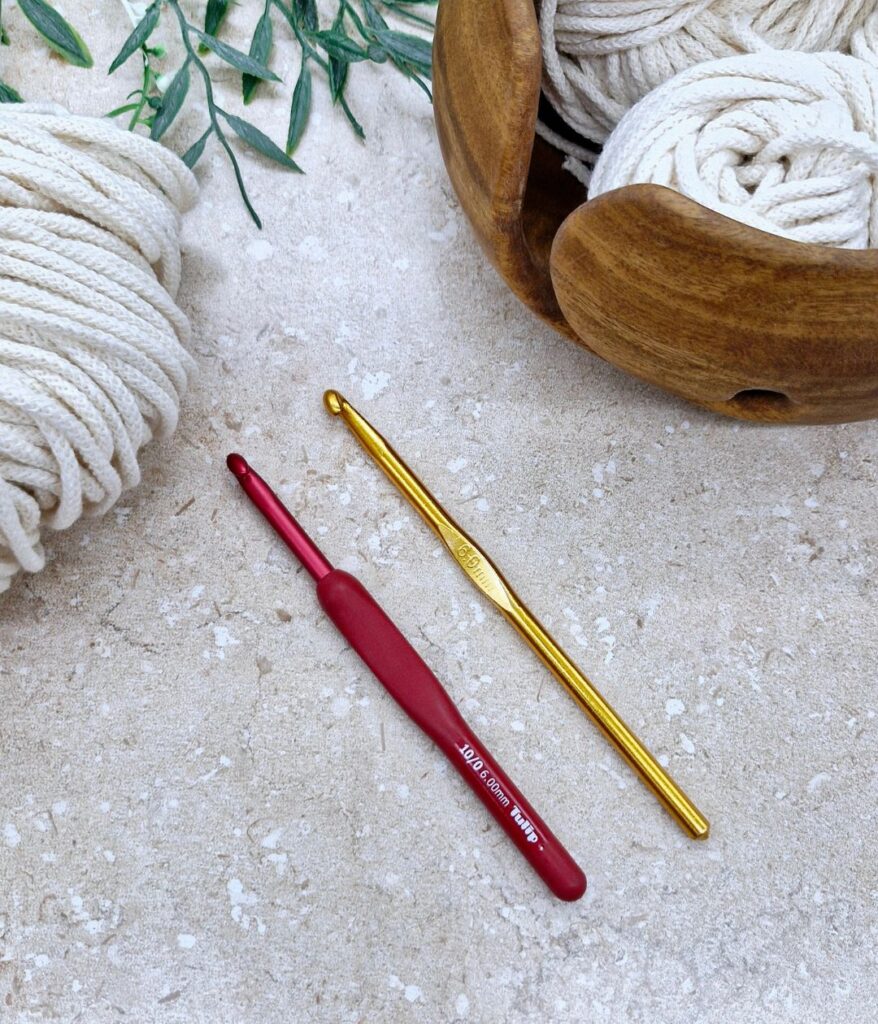
6 mm (US J/10)
Or size to obtain gauge.
The diameter at the widest part of the rug at the end of Round 10 should be 35 cm (14 in).
As long as the gauge at R10 is achieved, your rug will be 120 cm (47 in) when finished.
In order to obtain the correct gauge you may need to change your hook size or alter your tension.
The size of your rug at R10 is an indicator of the finished size. If your rug is larger at R10 than listed above, the finished size will be larger than listed. If your rug is smaller at R10, the finished size will be smaller.
While obtaining gauge isn’t essential for successfully completing the rug, doing so will increase the likelihood that you’ll have enough cord or yarn to finish the project.
Hey there crochet enthusiast!
Just a quick note about the copyright of my blog post and crochet pattern. While I’m thrilled to share my creativity with you, it’s important to respect the hard work that goes into designing these patterns.
The Oasis + Extension floor rug pattern and its contents are fully owned and copyrighted by Floornament, and all rights are reserved. This pattern is protected by copyright and other intellectual property laws and may not be reproduced, distributed, or transmitted in any form or by any means, including photocopying, recording, screenshots, printing or other electronic or mechanical methods, without the prior written consent of the author.
Any unauthorized distribution or reproduction of this pattern or elements of the instructions is strictly prohibited and may result in civil or criminal penalties. This free crochet pattern is intended for personal viewing on the blog only. By accessing this pattern, you acknowledge and agree to comply with these copyright terms and conditions.
If you prefer to have a printable version, you may purchase a digital PDF pattern in one of my pattern shops.
Let’s keep the crochet community thriving by supporting each other’s talents and respecting intellectual property rights. Happy crocheting!
Learn the Crochet Abbreviations used in this pattern.
Learn How To Read a Floornament Crochet Pattern. This post includes Abbreviations, Symbols and Notes about reading this crochet pattern.
Learn How To Crochet a Larger Rug.
If you would like to purchase a printable version of the Oasis + Extension crochet pattern you can find it in the Periwinkle Crochet Etsy and Ravelry stores.
Oasis
| Round | Instructions | Stitch Count |
| 1 | Use a CStr for the first tr of this round and every other round that starts with a tr (See Special Stitches). Magic ring, ch1 Tr x 16, slst in tr | 16 tr |
| 2 | Ch1, *dc, ch1* x 16, slst in dc | 16 dc, 16 ch1 |
| 3 | Ch1, *dc, FPtr around tr of R1, skip ch1* x 16, slst in dc | 16 dc, 16 FPtr |
| 4 | *tr, FPtr* x 16, slst in tr | 16 tr, 16 FPtr |
| 5 | See Special Stitches for FPpuff stitch. *tr, (tr, FPpuff)* x 16, slst in tr | 32 tr, 16 FPpuff |
| 6 | Ch1, dc x 48, slst in dc | 48 dc |
| 7 | The first tr of this round goes into the first dc of R6. See Special Stitches for inv slst. Ch1, *FPpuff around tr of R5, tr x 2, 2tr, skip tr and FPpuff of R5* x 16, inv slst in FPpuff | 16 FPpuff, 64 tr |
| 8 | Ch1, BPdc x 80, slst in BPdc, slst in next 3 BPdc | 80 BPdc |
| 9 | Tr x 80, slst in tr | 80 tr |
| 10 | Ch1, *(FPtr, tr, FPtr), tr x 3, FPpuff, FPtr, FPpuff, tr x 3* x 8, slst in FPtr, slst in tr | Stitch count is per repeat for R10 – R14. 3 FPtr, 7 tr, 2 FPpuff |
| 11 | Ch1, *FPtr, (tr, FPtr), tr x 4, FPpuff, tr x 4, (FPtr, tr)* x 8, slst in FPtr | 3 FPtr, 10 tr, 1 FPpuff |
| 12 | Ch1, *(FPtr, tr, FPtr), tr, FPpuff, tr x 9, FPpuff, tr* x 8, slst in FPtr, slst in tr | 2 FPtr, 12 tr, 2 FPpuff |
| 13 | Ch1, *FPtr, (tr, FPpuff), tr x 13, (FPpuff, tr)* x 8, slst in FPtr | 1 FPtr, 15 tr, 2 FPpuff |
| 14 | Ch1, *FPpuff, tr x 17* x 8, slst in FPpuff | 1 FPpuff, 17 tr |
| 15 | Tr x 144, inv slst in tr | Total stitch count for R15 – R21. 144 tr |
| 16 | Ch1, BPdc x 144, slst in BPdc | 144 BPdc |
| 17 | *2tr, tr x 8* x 16, slst in tr, slst in next tr | 160 tr |
| 18 | Ch1, *FPpuff, tr x 4* x 32, slst in FPpuff | 32 FPpuff, 128 tr |
| 19 | *2tr, tr x 19* x 8, inv slst in tr | 168 tr |
| 20 | Ch1, BPdc x 168, slst in BPdc | 168 BPdc |
| 21 | Mark the 12th dc. Ch1, dc x 168, slst in dc Fasten off. | 168 dc |
Oasis Extension
| 22 | Attach cord to 12th dc of R21. *2tr, tr x 20* x 8, slst in tr, slst in next tr | 176 tr |
| 23 | Ch1, *(FPtr, tr, FPtr), tr x 4, FPpuff, FPtr, FPpuff, tr x 3, FPpuff, tr x 3, FPpuff, FPtr, FPpuff, tr x 4* x 8, slst in FPtr, slst in tr | Stitch count is per repeat for R23 – R27. 4 FPtr, 15 tr, 5 FPpuff |
| 24 | Ch1, *FPtr, (tr, FPtr), tr x 5, FPpuff, tr x 9, FPpuff, tr x 5, (FPtr, tr)* x 8, slst in FPtr | 3 FPtr, 21 tr, 2 FPpuff |
| 25 | Ch1, *(FPtr, tr, FPtr), tr, FPpuff, tr x 21, FPpuff, tr* x 8, slst in FPtr, slst in tr | 2 FPtr, 24 tr, 2 FPpuff |
| 26 | Ch1, *FPtr, (tr, FPpuff), tr x 25, (FPpuff, tr)* x 8, slst in FPtr | 1 FPtr, 27 tr, 2 FPpuff |
| 27 | *(tr, FPpuff, tr), tr x 29* x 8, slst in tr, slst in FPpuff | 31 tr, 1 FPpuff |
| 28 | *2tr, tr x 31* x 8, inv slst in tr | Total stitch count for R28 – R34. 264 tr |
| 29 | Ch1, BPdc x 264, slst in BPdc, slst in next BPdc | 264 BPdc |
| 30 | *2tr, tr x 15, 2tr, tr x 16* x 8, slst in tr, slst in next tr | 280 tr |
| 31 | Ch1, *FPpuff, tr x 4* x 56, slst in FPpuff | 56 FPpuff, 224 tr |
| 32 | Tr x 280, inv slst in tr | 280 tr |
| 33 | Ch1, BPdc x 280, slst in BPdc | 280 BPdc |
| 34 | Ch1, dc x 280, slst in dc Fasten off and weave in the ends. | 280 dc |
Oasis
Round | Instructions | Stitch Count |
1 | Use a CSdc for the first dc of this round and every other round that starts with a dc (See Special Stitches). Magic ring, ch1 Dc x 16, slst in dc | 16 dc |
2 | Ch1, *sc, ch1* x 16, slst in sc | 16 sc, 16 ch1 |
3 | Ch1, *sc, FPdc around dc of R1, skip ch1* x 16, slst in sc | 16 sc, 16 FPdc |
4 | *dc, FPdc* x 16, slst in dc | 16 dc, 16 FPdc |
5 | See Special Stitches for FPpuff stitch. *dc, (dc, FPpuff)* x 16, slst in dc | 32 dc, 16 FPpuff |
6 | Ch1, sc x 48, slst in sc | 48 sc |
7 | The first dc of this round goes into the first sc of R6. See Special Stitches for inv slst. Ch1, *FPpuff around dc of R5, dc x 2, 2dc, skip dc and FPpuff of R5* x 16, inv slst in FPpuff | 16 FPpuff, 64 dc |
8 | Ch1, BPsc x 80, slst in BPsc, slst in next 3 BPsc | 80 BPsc |
9 | Dc x 80, slst in dc | 80 dc |
10 | Ch1, *(FPdc, dc, FPdc), dc x 3, FPpuff, FPdc, FPpuff, dc x 3* x 8, slst in FPdc, slst in dc | Stitch count is per repeat for R10 – R14. 3 FPdc, 7 dc, 2 FPpuff |
11 | Ch1, *FPdc, (dc, FPdc), dc x 4, FPpuff, dc x 4, (FPdc, dc)* x 8, slst in FPdc | 3 FPdc, 10 dc, 1 FPpuff |
12 | Ch1, *(FPdc, dc, FPdc), dc, FPpuff, dc x 9, FPpuff, dc* x 8, slst in FPdc, slst in dc | 2 FPdc, 12 dc, 2 FPpuff |
13 | Ch1, *FPdc, (dc, FPpuff), dc x 13, (FPpuff, dc)* x 8, slst in FPdc | 1 FPdc, 15 dc, 2 FPpuff |
14 | Ch1, *FPpuff, dc x 17* x 8, slst in FPpuff | 1 FPpuff, 17 dc |
15 | Dc x 144, inv slst in dc | Total stitch count for R15 – R21. 144 dc |
16 | Ch1, BPsc x 144, slst in BPsc | 144 BPsc |
17 | *2dc, dc x 8* x 16, slst in dc, slst in next dc | 160 dc |
18 | Ch1, *FPpuff, dc x 4* x 32, slst in FPpuff | 32 FPpuff, 128 dc |
19 | *2dc, dc x 19* x 8, inv slst in dc | 168 dc |
20 | Ch1, BPsc x 168, slst in BPsc | 168 BPsc |
21 | Mark the 12th sc. Ch1, sc x 168, slst in sc Fasten off. | 168 sc |
Oasis Extension
1 | Attach cord to 12th sc of R21. *2dc, dc x 20* x 8, slst in dc, slst in next dc | 176 dc |
2 | Ch1, *(FPdc, dc, FPdc), dc x 4, FPpuff, FPdc, FPpuff, dc x 3, FPpuff, dc x 3, FPpuff, FPdc, FPpuff, dc x 4* x 8, slst in FPdc, slst in dc | Stitch count is per repeat for R23 – R27. 4 FPdc, 15 dc, 5 FPpuff |
3 | Ch1, *FPdc, (dc, FPdc), dc x 5, FPpuff, dc x 9, FPpuff, dc x 5, (FPdc, dc)* x 8, slst in FPdc | 3 FPdc, 21 dc, 2 FPpuff |
4 | Ch1, *(FPdc, dc, FPdc), dc, FPpuff, dc x 21, FPpuff, dc* x 8, slst in FPdc, slst in dc | 2 FPdc, 24 dc, 2 FPpuff |
5 | Ch1, *FPdc, (dc, FPpuff), dc x 25, (FPpuff, dc)* x 8, slst in FPdc | 1 FPdc, 27 dc, 2 FPpuff |
6 | *(dc, FPpuff, dc), dc x 29* x 8, slst in dc, slst in FPpuff | 31 dc, 1 FPpuff |
7 | *2dc, dc x 31* x 8, inv slst in dc | Total stitch count for R28 – R34. 264 dc |
8 | Ch1, BPsc x 264, slst in BPsc, slst in next BPsc | 264 BPsc |
9 | *2dc, dc x 15, 2dc, dc x 16* x 8, slst in dc, slst in next dc | 280 dc |
10 | Ch1, *FPpuff, dc x 4* x 56, slst in FPpuff | 56 FPpuff, 224 dc |
11 | Dc x 280, inv slst in dc | 280 dc |
12 | Ch1, BPsc x 280, slst in BPsc | 280 BPsc |
13 | Ch1, sc x 280, slst in sc Fasten off and weave in the ends. | 280 sc |
Well done!! Now you can find the perfect place for your Floornament in your home and enjoy it every single day!
I hope you have enjoyed crocheting the Oasis rug as much as I did designing it.
I’d love you to share your rug with me, so please tag Floornament in any social media posts.
Happy crocheting!


Hi, I’m Andrea!
I am a wife and mum of 6 kids.
I love to camp, eat chocolate and I’m addicted to crochet!
Floornament was born out of a love of crochet and a desire to create crochet patterns so that others can decorate their home with beautiful crochet floor rugs.
FOLLOW ME
Stay In The Loop
CROCHET REFERENCE BOOK Printable PDF
Sign up for your FREE BOOK plus stay up-to-date with the latest Floornament designs, news and sales.

Stay In The Loop
CROCHET REFERENCE BOOK Printable PDF
Sign up for your FREE BOOK plus stay up-to-date with the latest Floornament designs, news and sales.